Wednesday, March 18, 2009

The Sea Pro 2100 enters the scene

Hmmm, I tried posting this earler and lost the image, etc. Anyway, the key shaped brown plastic next to the Creek Bank logo is covering a 3/8 inch hole. With the motor stopped, lifting this allows air to vent from the dome. Air in the dome causes the Bait Spa to float up. This creates problems because all the bait is under the Bait Spa. Venting the air keeps the Spa on the bottom of the bucket. The brown mesh is rain gutter leaf guard and keeps the bait from hiding under the Spa.

This is the Sea Pro right after the installation of the T top and bimini. Rod holders on the rail, the trolling motor,
main auxiliary Creek Bank Bait Tank will all be s hown later.


Just who is that masked man?


Ha, ha, it's only Joy T Brew using face protection that is necessary on the boat at speed. Rain, wind, cold, and bugs (Buggs Island Lake) all add up to some damage to the eyes, etc.

Friday, October 17, 2008

The pond jon grows up

A planer board deployed. This pulls the bait away from the boat, one on each side. When a fish takes the bait, the like drops out of a clip and the board doesn't interfere with recovering the fish.
Sort of a close up of the planer board stowed in the boat.
As you can see, my daughter, Debbie wasn't all that happy with being up so early. Then, the beauty all around on the lake was worth getting up. The fall colors are just arriving. John Kerr Reservoir is huge, about 40 miles long. This trip was to allow a charter captain to teach us novice how to fish.
The charter captain, Ramrod, is well known as an expert striper fisherman and guide. Retired from Phillip Morris in Richmond, VA about 20 years ago and relocated near Townsville, NC, right on Kerr. Been running charters ever since is well known and respected for his ability to find stripers.
Debbie's now with a smile with her first catch of the morning. Not legal size, but . . .
Well, after 5 hours of floating around on the lake, the fish found the boat. Hooked 3 with two 26 inch keepers and one smaller toss back. That was it for the day, but we learned a lot to apply to the Big Daddy fishing boat.


The pond jon was too tippy and specifically a one person boat. So, the Neptune became the Daddy fishing boat. As a first, it's not great as just a fishing boat, but . . .

Still have the pond jon to play with in the shallows of Staunton River State Park. Many of the lessons learned from it are being applied to the Big Daddy!
The original bow stop was black rubber and marked the stem badly.
Added the side bunks to help get the boat recovered from the launch. Almost learned how to do it.
Got tired of trying to adjust the original transom tie downs and substituted the retracting ratchet.

Wednesday, September 17, 2008

The seat bracket supports the tall riser quite well and the model support is quite stabil. I may add more braces as time passes and I learn. I call this a model because I didn't know how to do the job. Finally made a few decisions while fighting the mosquitoes and I'm surprised that the result seems so strong.

I may build a bulk head where the anchor rope is under the bow deck. Might be large enough to hold safety stuff, ropes, and other accessories that might be needed on the water.
The bracket plate is held with long lag screws. Same thing with the base aluminum angle, it is secured with long lag screws.

As a temporary means to secure the base to the boat, I used pop-rivets through the aluminum angle and into the ribs. Only one in each corner for now as this is a model. Aluminum angle and square tube would have looked more professional, but that can come later if the unit remains solid.
I need to change the slope of the seat by using a wedge under the bracket or taking the bracket off and trimming the 2X8 treated wood.

The high rise stand off is just right so I can stand easily without strain. A lower seat would require a lot of effort and likely a grab rail for support.

I'll put a wood deck against the boat bottom and cover it with carpet.

I think I'll be able to control the Trolling Motor from the standing position.
I thought to get rid of the snake nest wiring, but all I've accomplished is putting in new wire, fuse links, and making a hook up for the battery. Still don't know how I'll secure the battery, but it seems that a piece of 1/4 inch plywood will slide under the rear bench and the tie down bungies will lock things in place.

Now need to purchase new batteries as I neglected the one from the Airstream Safari for too long a period.

More later . . .

Thursday, September 11, 2008

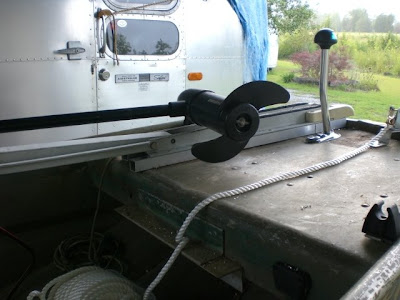
Been a while since I posted any progress on my fishing boat, but I have been working on it almost each day. This photo shows the routing of the front anchor rope pulley, the stowed position for the front running light, and the new support for the trolling motor. Due to the shape of the bow brace, the support for the anchor rope pulley took some planning.
Again, this shows the new support for the trolling motor. The original plywood support was rotted beyond use.
The rear anchor rope/pulley was installed to replace a stand-off that I fail to understand. These anchor rope pulley lock the rope from going out due to the pressure of the anchor. A light tug releases the rope and the rope can be retrieved and stowed. I'd like the anchor hanging on the rope to be coated with some type of insulation, but . . .
Same photo twice? Well, it was a long day.
The starting battery was supposed to fit under the seat, but it's a few inches too tall unless I cut the handle. This battery is intended to supply clean power to the sonar. Connecting the sonar to the battery powering the trolling motor might give some false signals. A work in progress and some things may work and others may not.

Tuesday, August 5, 2008

Finally clean enough for serious plan and float for leaks

You can invision the weight of the 1/2 inch iron that the aluminum swivel seat was mounted on. Must have been 75 pounds with the 1/2 inch wood deck. I can make a support that weighs a fraction of the original.
Sometimes it's really trying to get posted what I want. Here's the bow area with the front deck and seat bracket removed. I'm thinking to install a foot high pedestal similar to the one behind the center deat. Maybe a storage locker against the front bulkhead that can be used as a step to the upper deck. I'll reinstall a plywood cover to hold the trolling motor and running light.


Yet, it seems that the trolling moter mounted on the transom would be better suited?


Saturday, August 2, 2008

A fool and his money are always parted black hole

This is one of the commercial rod holders. I like 'em - clean and efficient.
I wonder what the layout for a 14 foot fishing boat is supposed to be?

Since I know so little about fishing, I think this is a live well. Seems like water is pumped in from the pump at the transom and the overflow goes? The little red-top thing is supposed to be an aerator?
This is up front and I now have most of the upper deck wood cut out, the wood/carpet in the bottom removed and still need to shovel all the crap out.
Don't really know what it is. the angle bracket seems to be the base of a trolling rod holder. The vertical seems to be a long ago swivel seat base.

Never have learned to keep the most recent post at the end, so I'll continue as I know bass ackward. This is the wood removed from the boat bottom and the base for the humming bird module. It will be moved, but where? It's sort of under a seat bracket/swivel seat for some reason.

OK, I went and did it! Bought a project fishing boat. It looks like a boat, but it's rotted away on the inside and . . .
I does have a humming bird that may or may not work.
Don't know if I'll ever find out what all the holes are for. the plug on the left is to drain the water from the inside. The opening on the right seems to be a water supply for the live well. I don't know if it's for bait or fish.
This home built rod holder is one of several installed on the boat. Nasty looking, but seems functional for cat fishing.


Of course, a battery didn't come with the snake nest mess. Likely, I'll need to run all new wires and get some corrosion inhibitor on the fasteners, etc.